
Your menu: dishes, categories, and prices
Where dishes are created, prices are set, and items that are out of stock are marked. It's the screen you will use the most.
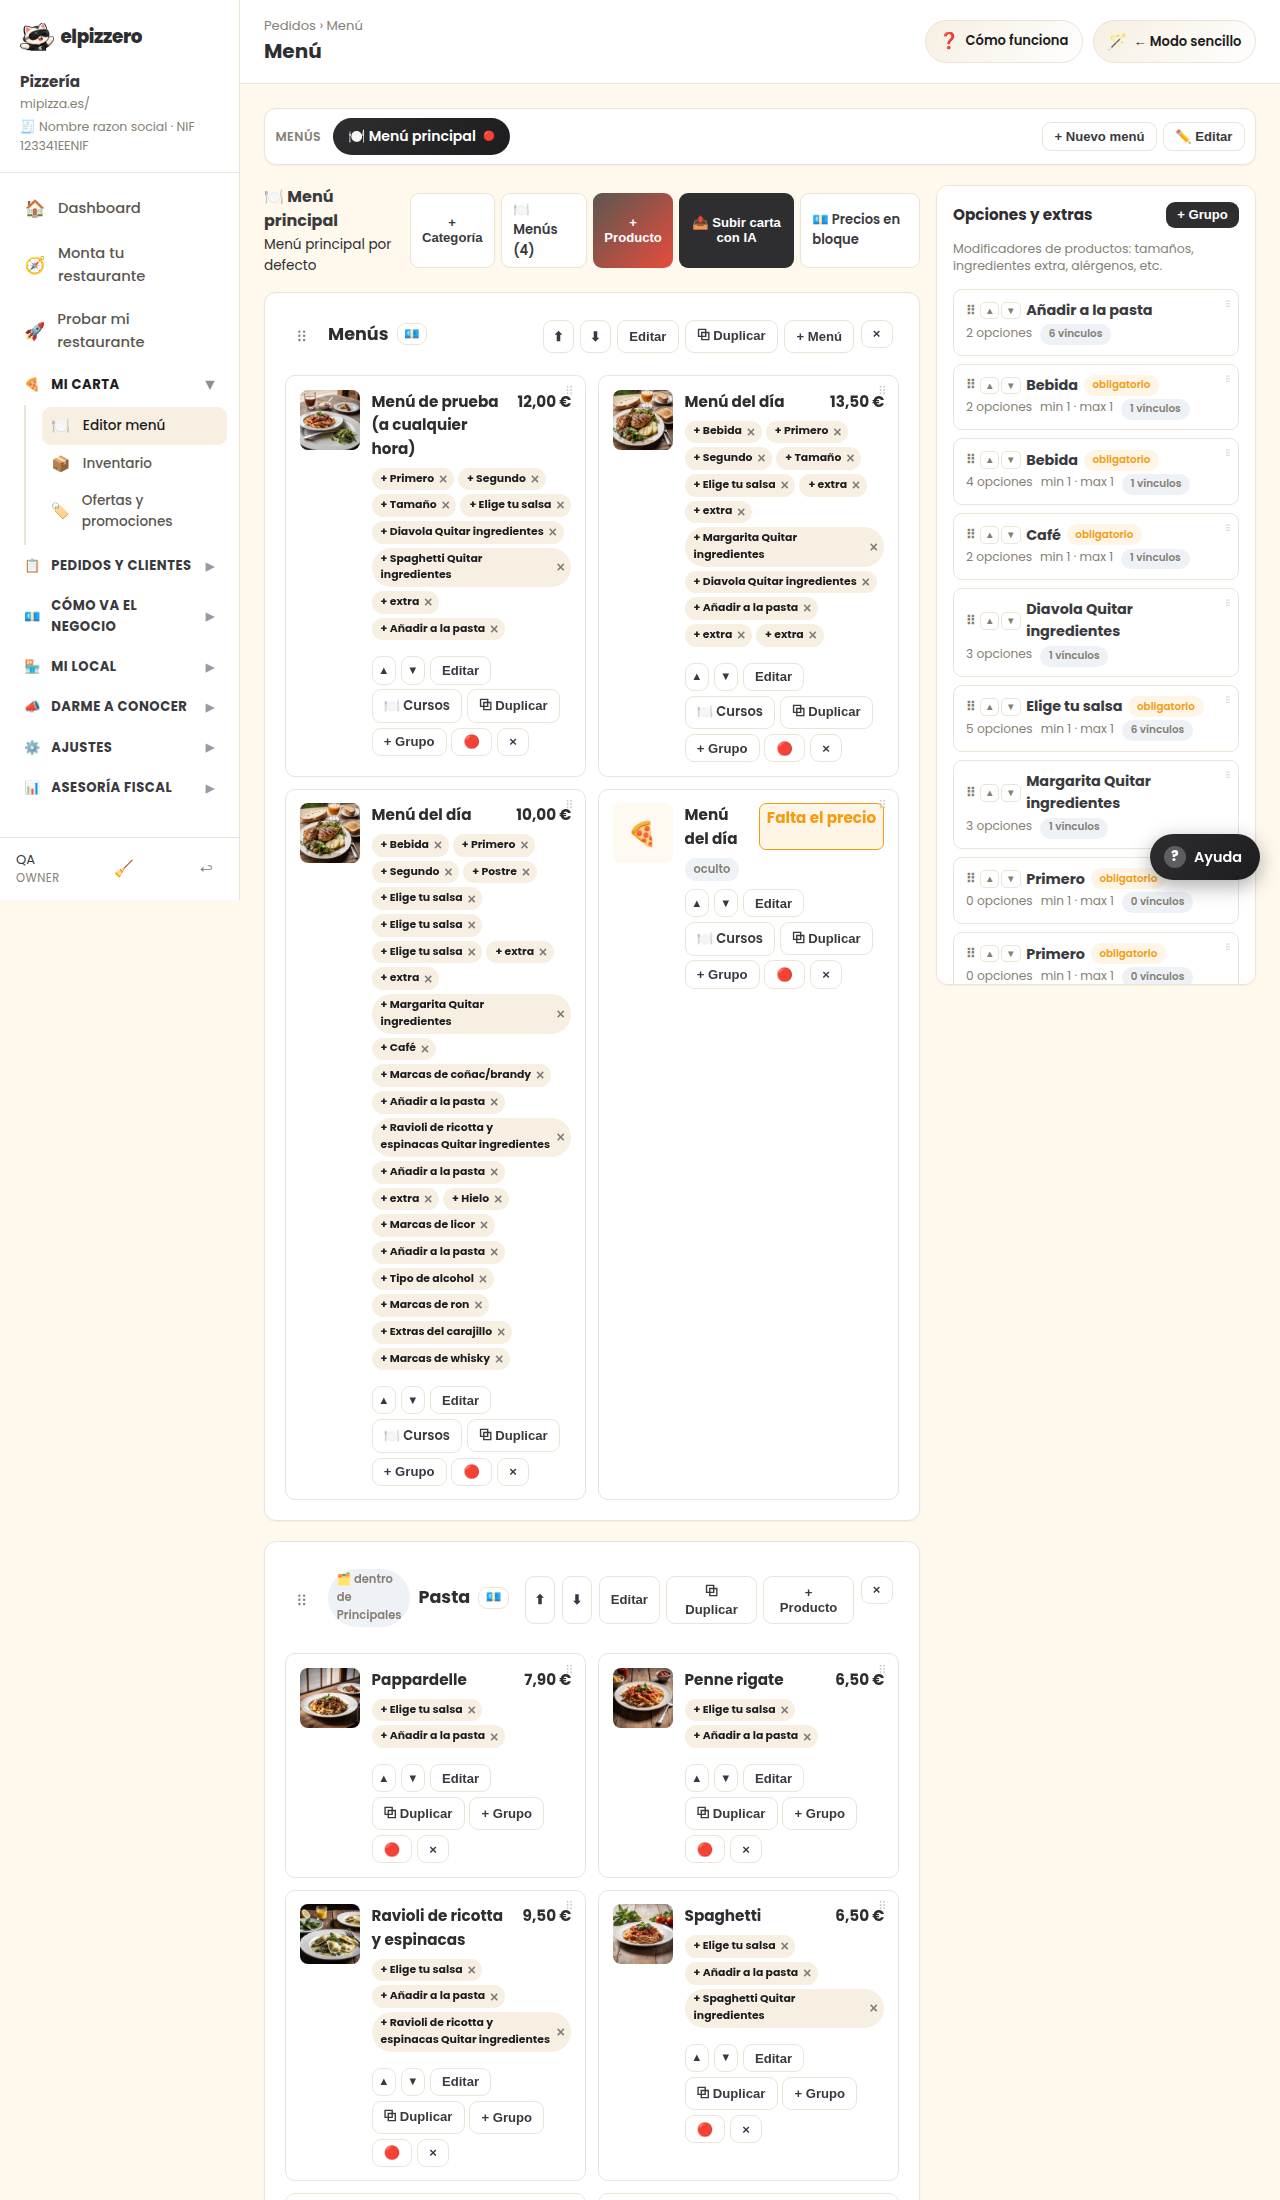
What it's for
It's your menu. What you put here is exactly what your customer sees when they open your page, and what appears on the POS when you take an order by phone. No dishes here, no one can order anything from you: your page is visible, but it doesn't allow orders.
How it's organized
From outside to inside, there are three levels:
- The menu (at the very top, "Main Menu"). Almost all restaurants have only one. It serves to have different menus, for example one for lunch and another for dinner.
- The categories: Pizzas, Burgers, Drinks… These are the sections your customer will see, in the same order you place them here.
- The products: each dish, with its photo, description, and price.
Upload the menu from a photo
If you have the menu on paper, you don't need to write anything. Press “📤 Upload menu with AI”, take a photo, and the system reads the dishes and prices for you. Then review them one by one: the automatic reading is almost always accurate, but a misread of 8.50 is money you lose on each order.
If you're on the computer and have the paper menu on the counter, that same screen gives you a QR code to continue from your mobile and take the photo with it.
Add a dish manually
- Press “+ Category” if you don't have the section yet (for example "Desserts").
- Press “+ Product”, the one inside that category.
- Enter the name, price, and, if you want, a short description and a photo.
The photo is not mandatory and you can add it later, at your own pace. But it's what sells the most: dishes with photos are ordered more.
Mark a dish as sold out
It's the red round button on each dish. When pressed, the dish remains on the menu but shows the label "Sold Out" and no one can order it. When you have it again, press it once more and it will be available again.
The buttons for each dish, one by one
- Edit: change name, price, description, or photo.
- + Group: add options to the dish (sizes, extra ingredients, meat doneness…). This allows the customer to choose "large" or "with extra cheese".
- 🔴 (red circle): sold out / available.
- ×: delete the dish permanently. For items that run out in a day, use the red circle, not this.
Sort the menu
The arrows ⬆ ⬇ for each category move it up or down. The order matters more than it seems: what you place at the top is what gets ordered the most, because it's the first thing the customer sees when they open the menu on their mobile.
Common mistakes
- Prices not reviewed after uploading the photo. This is the most expensive and frequent error. Review them before finalizing the menu.
- Deleting instead of marking as sold out. See above.
- Hidden categories. If a category has the label "hidden", you see it here but your customer does not. It's useful for preparing something before releasing it, and confusing if you forget you left it that way.
View all buttons and fields on this screen
What you'll find on this screen
- 🍽️ Main menu
- Pizzas
- Burgers
- Drinks
What each button does
| Button | What it's for |
|---|---|
| + New menu | |
| ✏️ Edit | |
| + Category | |
| + Product | |
| 📤 Upload menu with AI | Upload photos/PDFs of your menu and the AI automatically creates categories and products |
| ⬆ | Move category up |
| ⬇ | Move category down |
| Edit | |
| + Group | Link option group |
| 🔴 | Mark as sold out |